Here at Krait, we secure your cloud infrastructure without ever compromising your data’s privacy.Documentation Index
Fetch the complete documentation index at: https://docs.krait.io/llms.txt
Use this file to discover all available pages before exploring further.
Your configuration data is never stored. It is analyzed only in real time to help you stay protected. Once your cloud accounts are connected, Krait immediately begins scanning your environments.
Within minutes, you’ll start seeing insights about misconfigurations, exposed assets, compliance gaps, and potential risks across your cloud resources.
Connecting AWS
You can connect your AWS account to Krait using either Access & Secret Keys or through an AWS CloudFormation Template.For improved security and easier onboarding, we strongly recommend using the CloudFormation Template.
Using AWS CloudFormation
If you prefer a secure, hands-off setup, you can onboard AWS using our pre-configured CloudFormation template.This automatically creates a read-only role that Krait uses to analyze your cloud posture without storing any data.
Deploy the CloudFormation Template
Click Deploy AWS CloudFormation template, which will take you to the AWS Console with the template pre-loaded. Review the configuration and launch the stack to create the required IAM role.
Wait for Deployment to Complete
AWS will begin creating the stack.
Wait until the stack status becomes CREATE_COMPLETE before continuing.
This usually takes under a minute.
Wait until the stack status becomes CREATE_COMPLETE before continuing.
This usually takes under a minute.
Copy Your Role ARN
Once the stack is deployed, open the stack details in AWS CloudFormation.
Navigate to Stack → Outputs and locate the value labeled Role ARN.
Copy this ARN and use it to connect your AWS account to Krait.
Navigate to Stack → Outputs and locate the value labeled Role ARN.
Copy this ARN and use it to connect your AWS account to Krait.
Using Access and Secret Keys
Navigate to the Cloud integrations page
Go to the Integrations page from the sidebar and find the Amazon Web Services card in Clouds. Select the Access and Secret Keys option.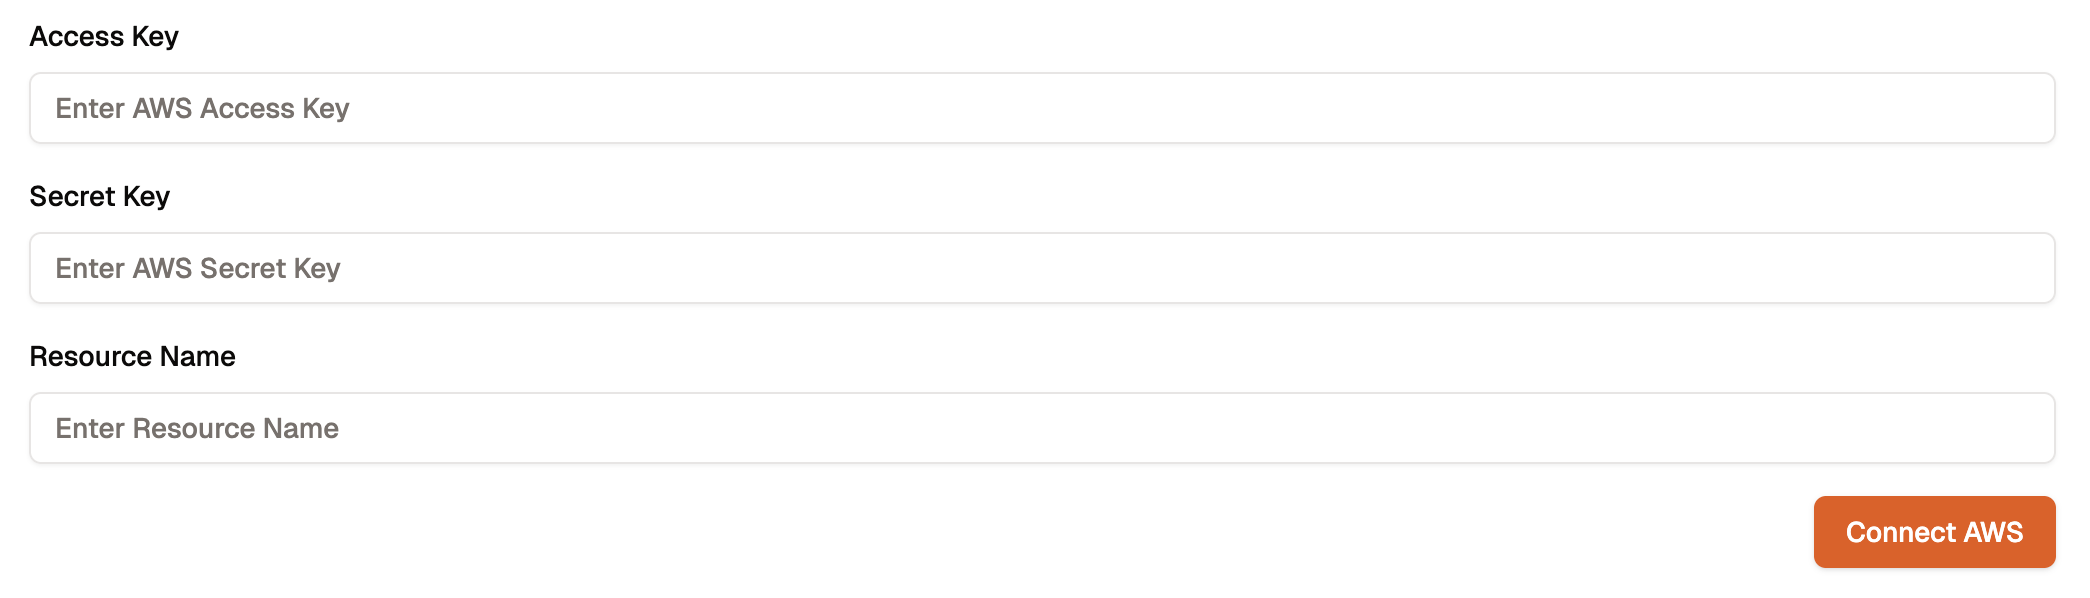
Open IAM in AWS Console
Sign in to your AWS Management Console and navigate to IAM (Identity & Access Management).
This is where you manage users, roles, and access credentials for your AWS environment.
This is where you manage users, roles, and access credentials for your AWS environment.
Choose the IAM User
Select the IAM user whose credentials you want to use for Krait.
Go to the Security credentials tab where you manage access keys and authentication settings.
Go to the Security credentials tab where you manage access keys and authentication settings.
Generate a New Access Key
Click Create access key and AWS will generate a new Access Key ID and Secret Access Key for you.
These credentials allow Krait to securely perform read-only scans of your cloud resources.
These credentials allow Krait to securely perform read-only scans of your cloud resources.
Securely Store Your Secret Key
AWS displays the Secret Access Key only once so please download or copy it and store it in a secure location.
You’ll need both values when connecting your AWS account to Krait.
You’ll need both values when connecting your AWS account to Krait.
Disconnecting AWS
To disconnect your AWS integration, open Integrations from the main sidebar and choose the Cloud Providers (or relevant) section where AWS is listed. Find AWS in the connected integrations list and click Disconnect. Only a workspace owner is permitted to disconnect AWS. Confirm the disconnection when prompted. Once disconnected, Krait will stop using your AWS credentials and access to AWS resources. You can reconnect AWS later from the same integration settings area.You may need to uninstall the KraitDev app from your AWS account manually.