

1
Connect DockerHub
Connect your DockerHub account to start scanning your container images.
DockerHub
Connect your DockerHub registry
2
Sync images
After connecting DockerHub, sync the container images you want to scan. The number of images you connect will depend on the type of your workspace.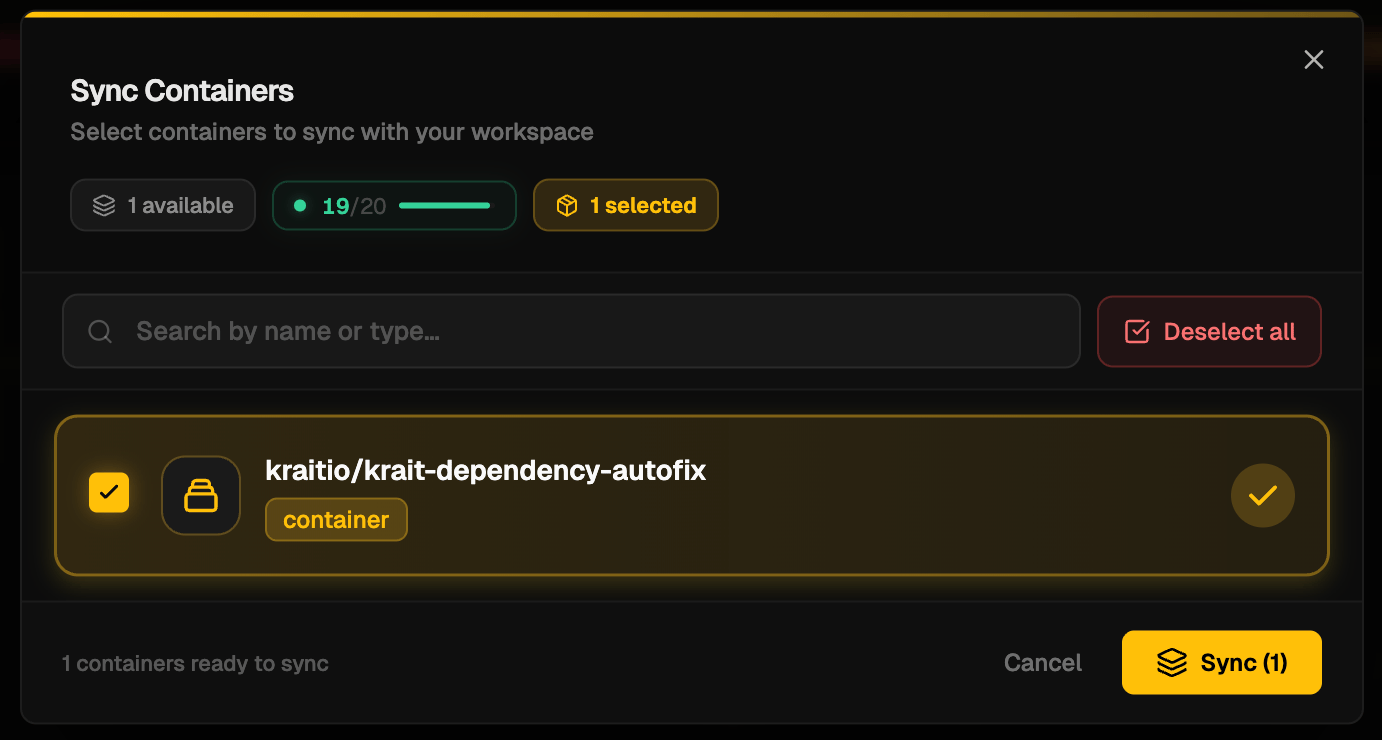
3
Start scanning
Initiate a scan on your selected container images. The scan take a few minutes depending on the size and number of images.
4
View findings
Once the scan completes, findings will appear on the page.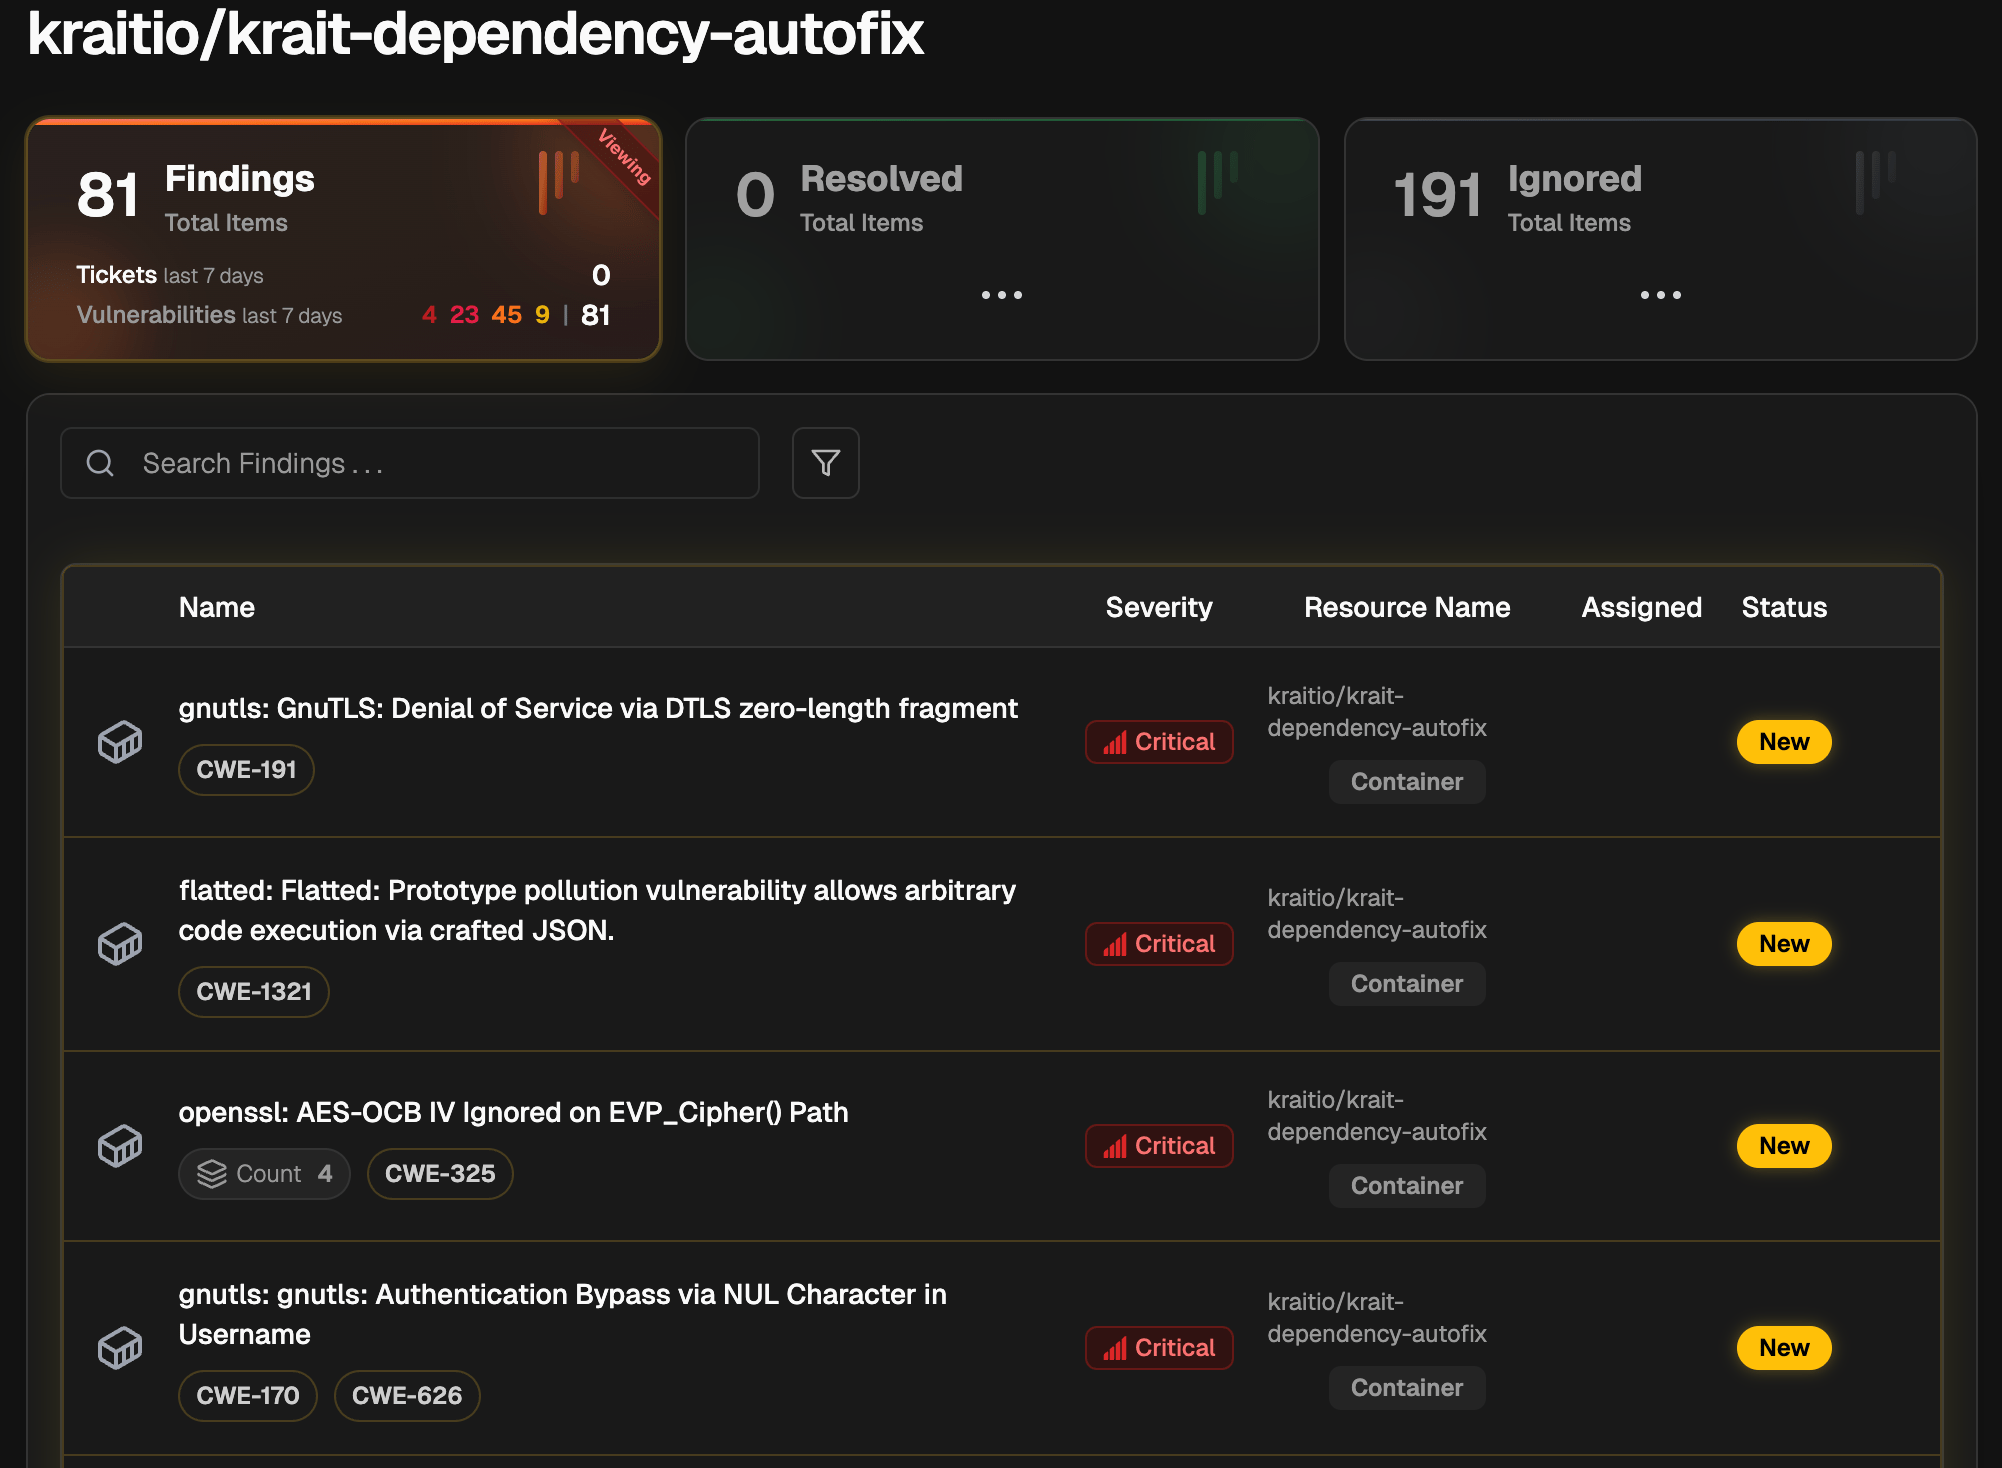
5
Analyze Findings
By clicking on any finding, you will see its detail. You will find a short explanation, the code snippet, catagory, severity, CVSS score, references. If a issue is present multiple times, Krait will only show one finding and group all the instances together. You can also create a ticket from the findings page.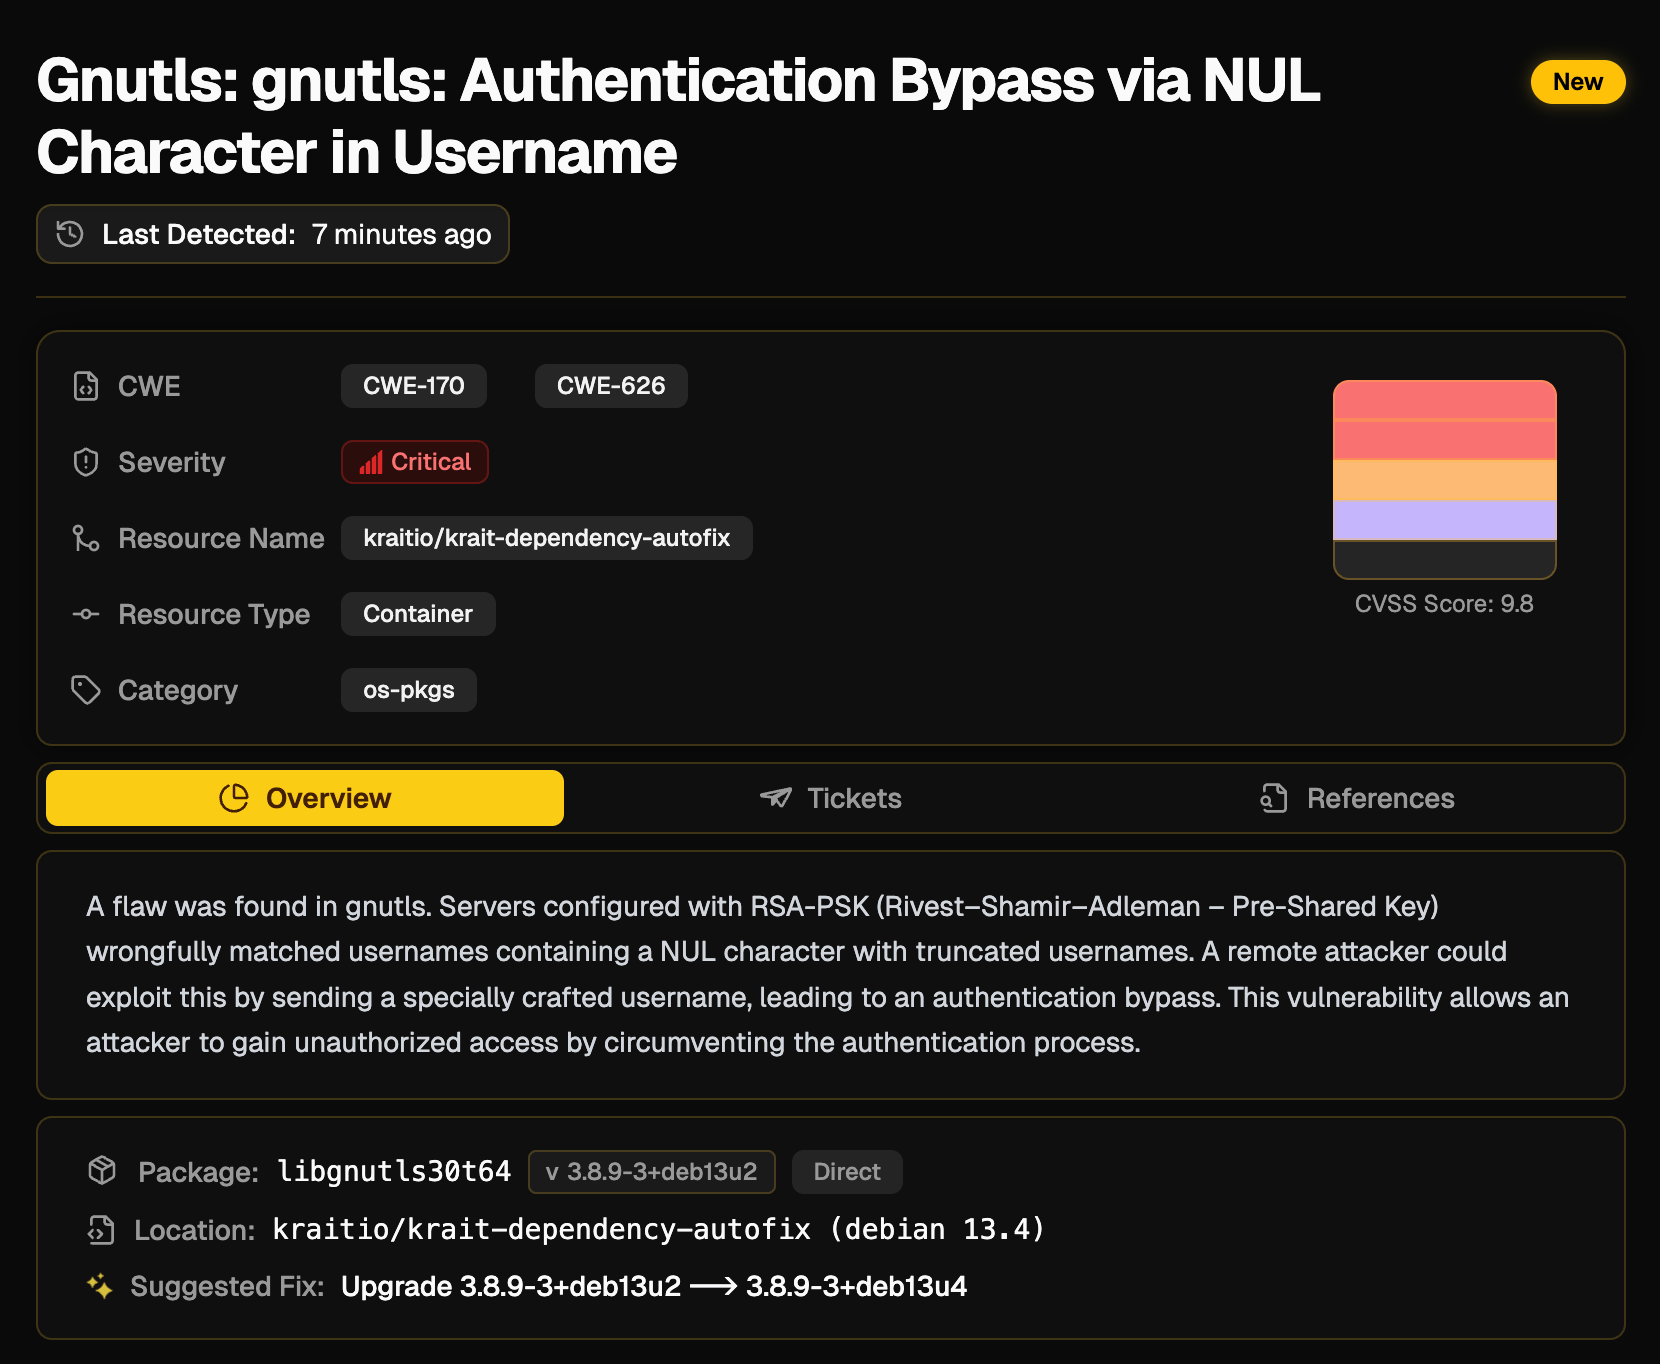
Linking to Repositories
When a container and a code repository share the same application context, scanning them independently can produce duplicate findings for the same underlying issue. Linking a container to its corresponding repository lets Krait merge overlapping results, giving you a single clean list of findings with no repeated noise.Each container can be linked to one repository only. You can unlink at any time without affecting your scans.
1
Navigate to Containers
Go to Assets, then select Containers.
2
Open Link Repository
Click Link Repository to open the linking panel.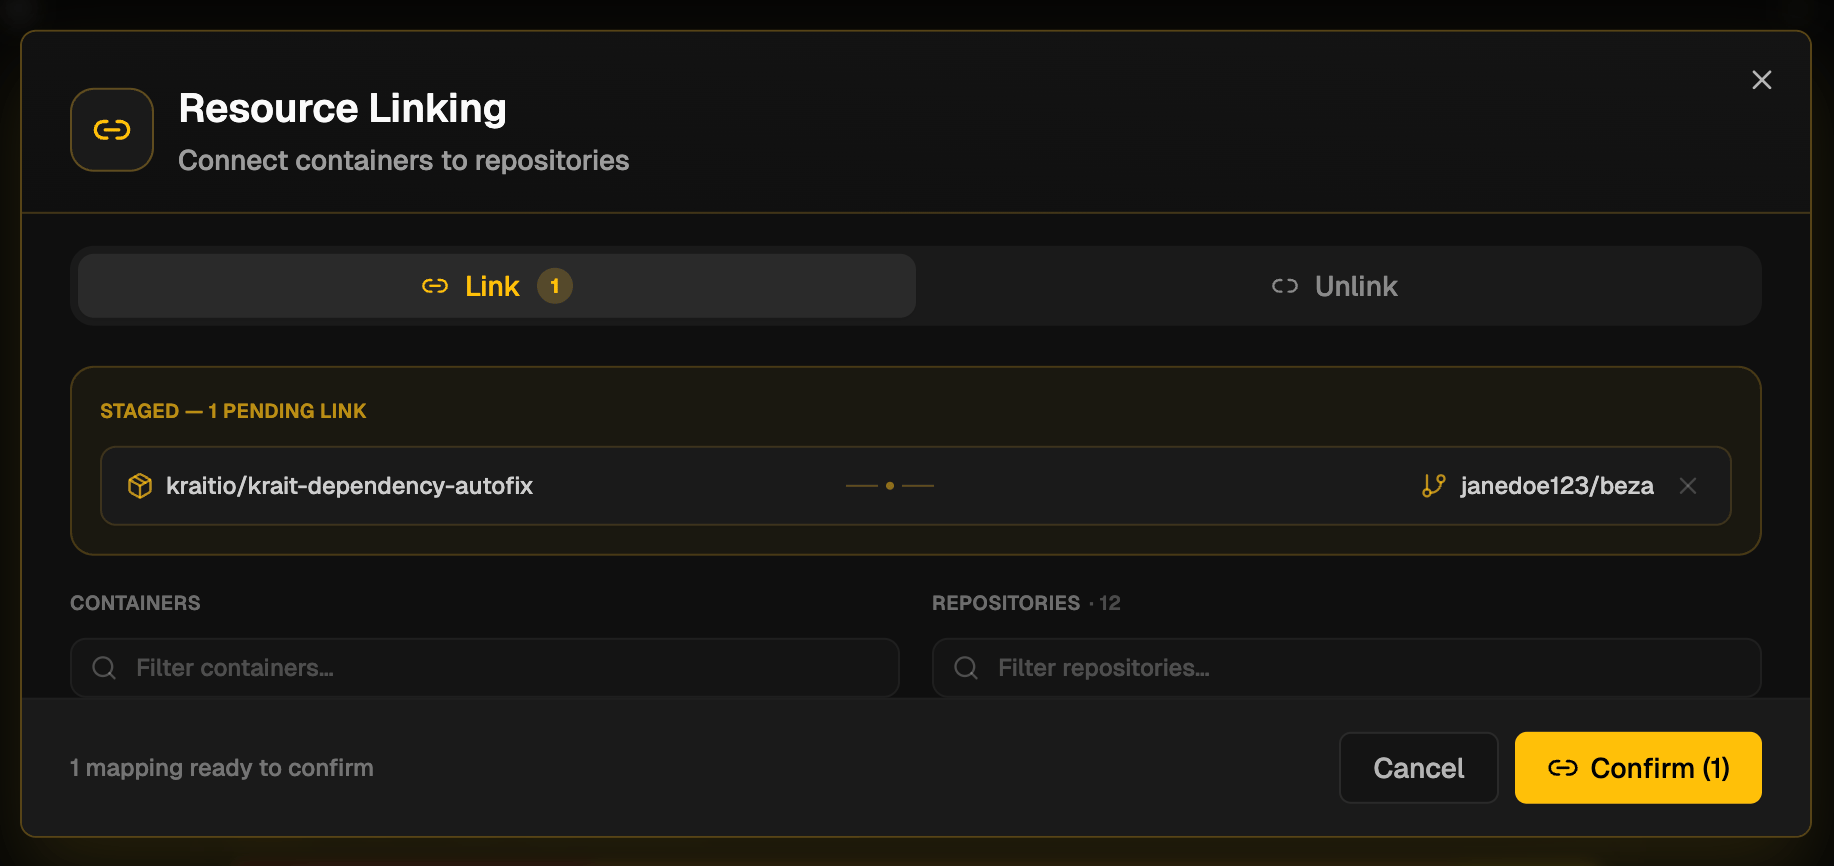
3
Select a Container and Repository
Choose a container from the list of connected containers, then select the repository you want to link it to from the list of connected repositories.
4
Confirm the Link
Click Confirm. Krait will now correlate findings across the linked container and repository, automatically deduplicating any overlapping vulnerabilities.