Documentation Index
Fetch the complete documentation index at: https://docs.krait.io/llms.txt
Use this file to discover all available pages before exploring further.
Creating Tickets
Open a Vulnerability and Start Ticket Creation
- Navigate to Vulnerabilities > Details for any finding.
- Click the Create Ticket button in the top–right action bar. This opens the Jira ticket creation dialog.

If Jira is not configured yet, Krait will prompt you to complete the integration before proceeding.
Ticket Creation Dialog
Clicking Create Ticket opens a structured form where key fields are automatically pre-filled based on the vulnerability.The dialog includes: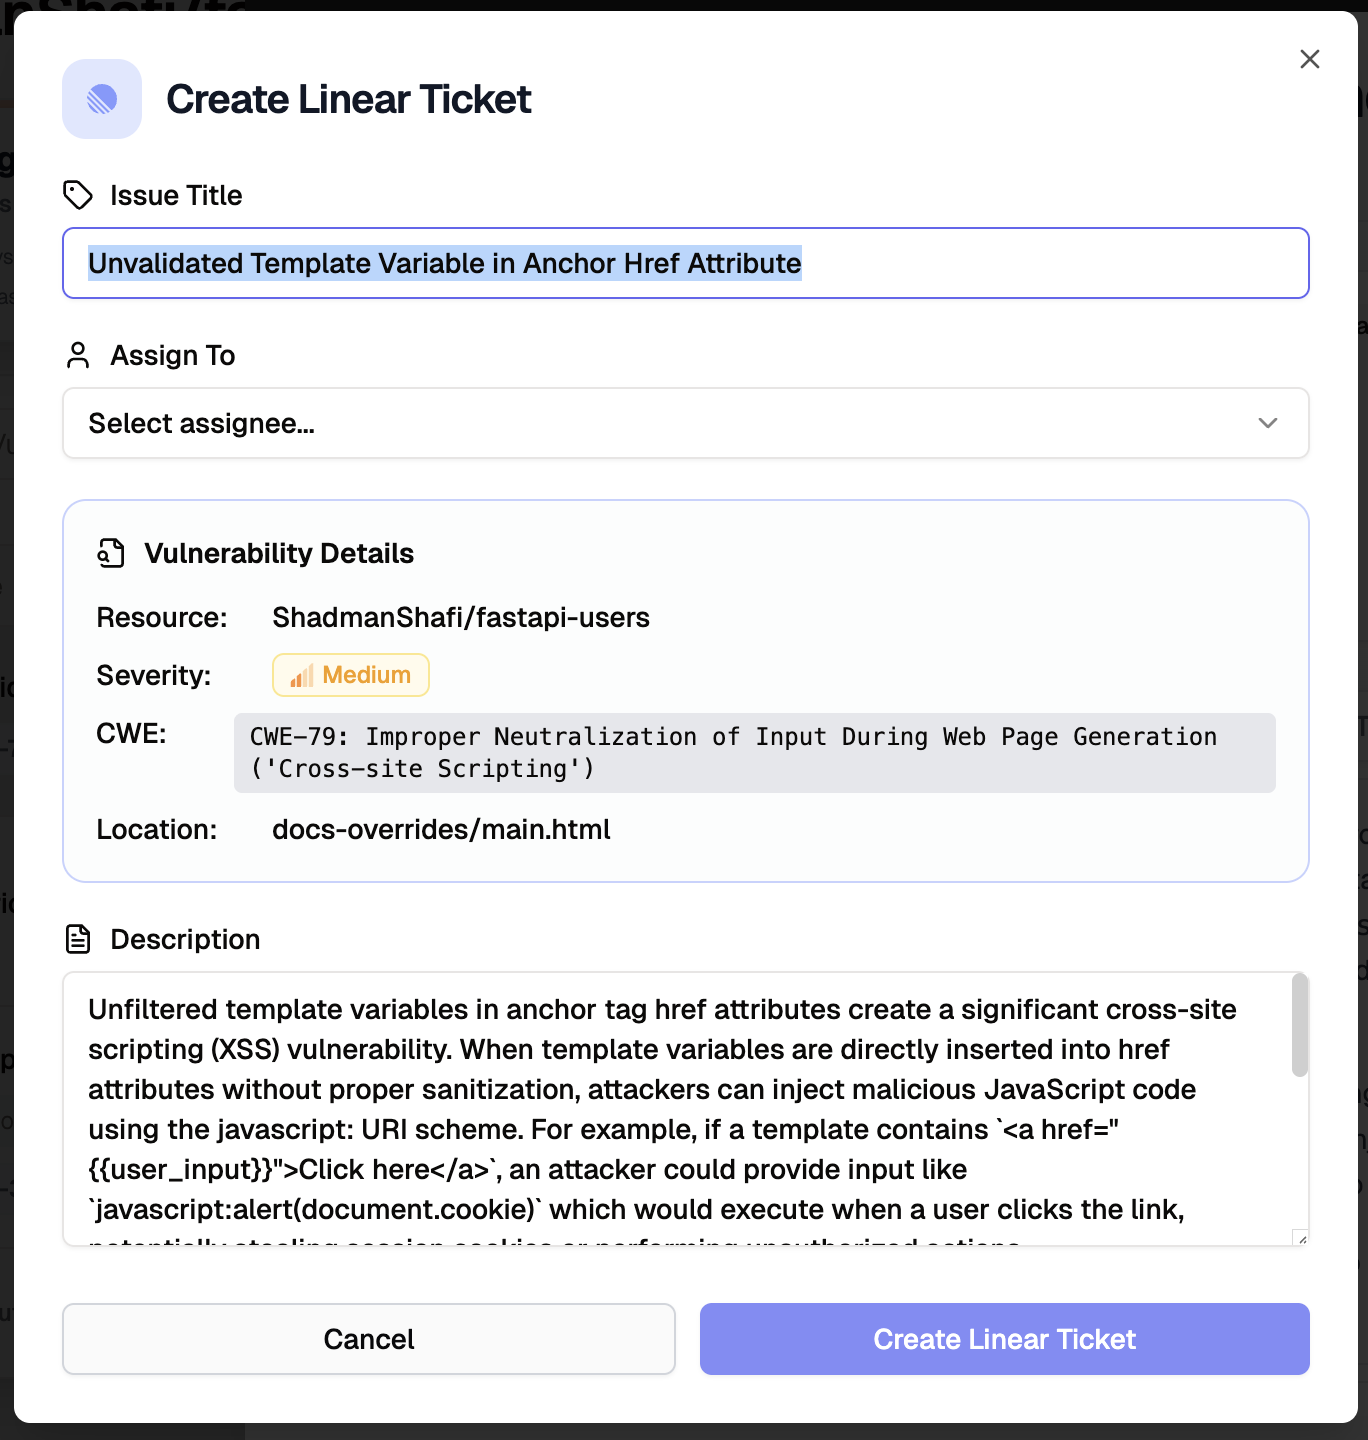
- Issue Title
Auto-generated using the vulnerability’s name. You may edit as needed. - Assignee
Optional field allowing selection of a Jira workspace member responsible for remediation. - Vulnerability Details Panel (read-only)
- Resource name
- Severity
- Category
- CWE
- File/API location
- Description
A detailed, pre-populated explanation containing:- Vulnerability summary
- Technical impact
- Example payload (if available)
- Recommended remediation guidance
Confirmation
When you click Create Jira Ticket:
- Krait sends the issue to your connected Jira workspace
- The issue is created under the configured Jira Project and Issue Type
- A success toast appears:
Jira ticket created successfully.The Jira issue is now linked to the vulnerability, allowing teams to move seamlessly from discovery to remediation.
After Ticket Creation
Once a Jira ticket is created, Krait automatically links it back to the originating vulnerability and updates the interface to reflect the new association.Where You Can See the Ticket
The ticket now appears under the Tickets tab within the vulnerability details page.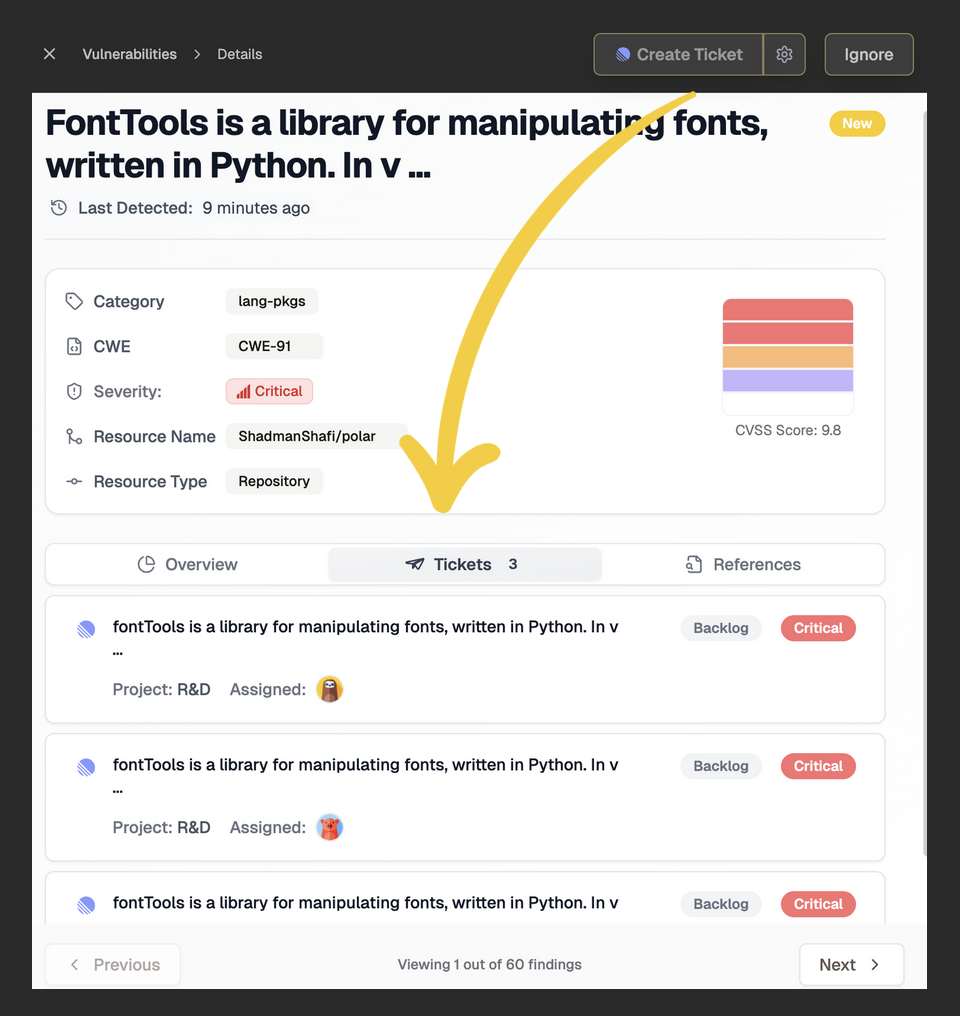
- Each linked ticket displays:
- Issue title (as created in Jira)
- Project name
- Assigned engineer
- Current Jira status (e.g., Backlog, In Progress, Done)
- Priority (when available)
Ticket Visibility Across Krait
The newly created Jira issue is also listed in the Tickets section of Krait’s main navigation, where you can filter and review all tickets across resources.Linked Metadata Displayed on the Vulnerability
On the vulnerability details page, under the “Tickets” tab, Krait shows:- A direct link to the Jira ticket
- The associated Jira issue key (e.g.,
PROJECT-123) - Ticket status and assignee
- Any other synced metadata supported by Jira (project, priority, workflow state)
How This Helps Your Team
This unified view enables:- Faster handoff from security to engineering
- Clear traceability from vulnerability → ticket → remediation
- Reduced context switching across tools
- Transparent ownership and accountability